Second Layer
Part 2 of working on the Wet Nurse Diorama! Now I’m going to start working on the second layer, which will lay on top of the pipes in the underground section I did last time. The Wet Nurse and pregnant women will go on that layer.
I cut out some fiberboard in a kind of organic shape and carved a hole for the spinal column to emerge from.
Can’t have the second layer looking flat and unrealistic, though! Bark (especially cork bark) makes excellent rock textures. I glued these to the underside. I’ll fill them in with smaller bits of bark and dirt later.
I also carved holes to accommodate the big pipes in the base.
Adding Detail
Time to add some more detail to the spine before I put it into place. It’ll be very difficult to add this stuff once it’s placed into the second layer. I’m going to add more tubing and stuff that looks like nerves or veins. Those are made out of plant roots that I pulled out of the ground and cleaned up.
The curved tubes are made of guitar strings, and the bits of pipe sticking out of the head are just bits of steel and copper tubing.
Securing the spine
Since this spine-thing is semi-alive, kind of, I thought it would be cool if it had to be ‘secured’ to keep it in place. I got some big jewelry chains for that purpose, then cut some little plates out of thick plasticard and glued them on.
Tiles!
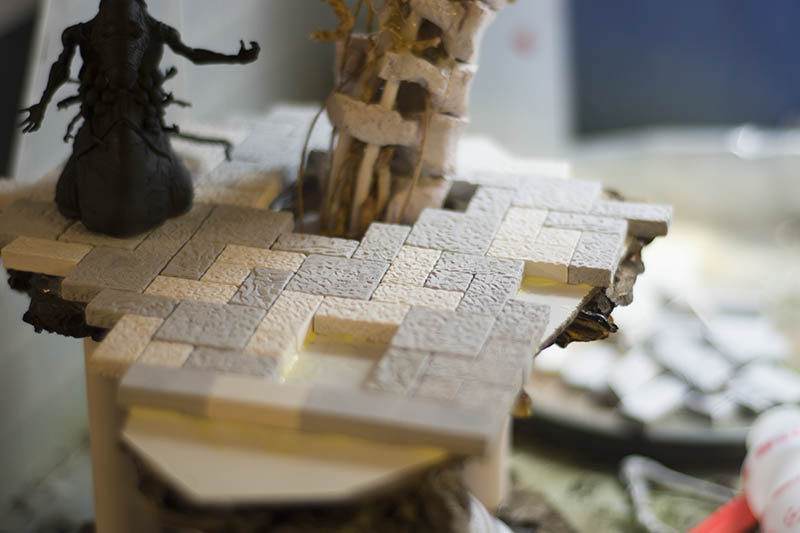
Time to make the upper area look better. I thought it would be cool if it was a kind of built-up area, so I cast a bunch of Hirst Arts blocks out of dental stone and glued them down.
I had to lay them around the hole in the middle, which was a pain. I’ll have to smooth them out later.
You’ll see that the one end has a row of steps. I think I’ll fill in the blank area on the other side with stone faces.
Goo!
Came across a cool tutorial on creating a weird flesh / goo effect by microwaving white glue, then peeling it off and applying. Works super well. I drilled a ‘port’ down into one of the pipes (I think I’m going to make it look like the babies are dropped down the port) and covered with white glue goo.
Looks slimy and gross and awesome.
I also added some goo to the head area to make it more cohesive and gross.
Spikey bits
And then I decided to put a bunch of spikes through the spine to help hold it in place (like the chains I did earlier) and because I think it looks cool. Took some thin dowel and carved them up with a razor.
That’s it for this update. Planning on filling out the gaps between the tiles and the fiberboard base next time, working on the channel that the face will be dripping goo into, and adding some more decorative details (more weird goo and lanterns!)


